
Thanks for stopping by for this month's tutorial on 'Ho, Ho, Ho and on we Sew' hosted by Fiona and Paula. Christmas is always a time of year when the kids and I enjoy making hand made gifts for friends and family. A couple of years ago we made these fantastic Christmas lollipop nose critters for their school friends. I thought it would be fun for us to make something else small that could easily be handed out as end-of-year presents at school, and that kids can make (either with you or by themselves depending on their age).
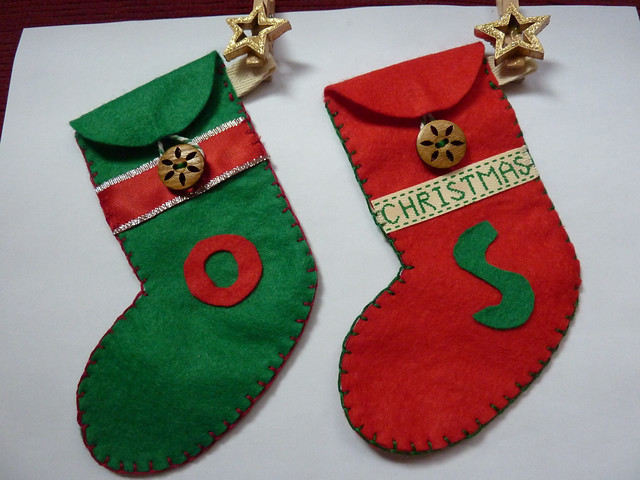
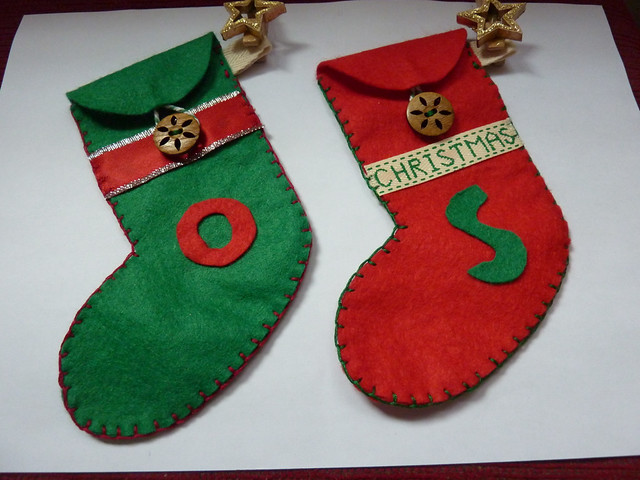
Introducing...The Envelope Christmas Stocking!
Made from felt, only takes an hour or so to make, can be decorated to suit all tastes, and the envelope flap at the top will prevent the goodies inside from falling out!
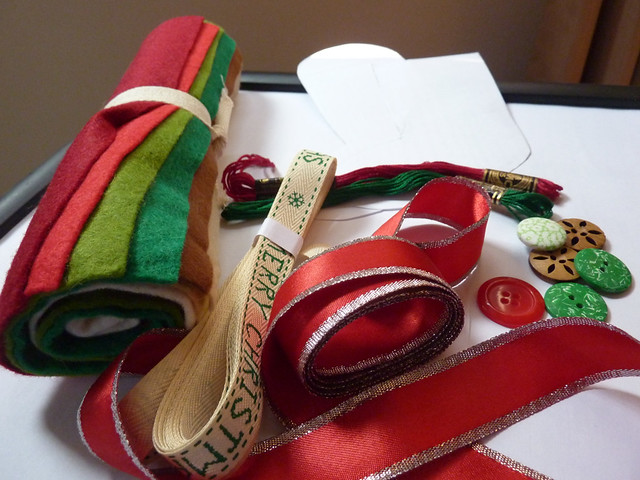
Wool felt
Ribbon
Twill tape
Buttons
Embroidery floss
Craft glue
Elastic or twine
1. Draw your stocking template onto paper or cardboard. Cut out and then trace around it again (this time you want the mirror image, so flip your initial template over) for the template for the back of the stocking. Before you cut out this second template draw a half circle shape onto the top of it. This will become the envelope flap.
1. Draw your stocking template onto paper or cardboard. Cut out and then trace around it again (this time you want the mirror image, so flip your initial template over) for the template for the back of the stocking. Before you cut out this second template draw a half circle shape onto the top of it. This will become the envelope flap.
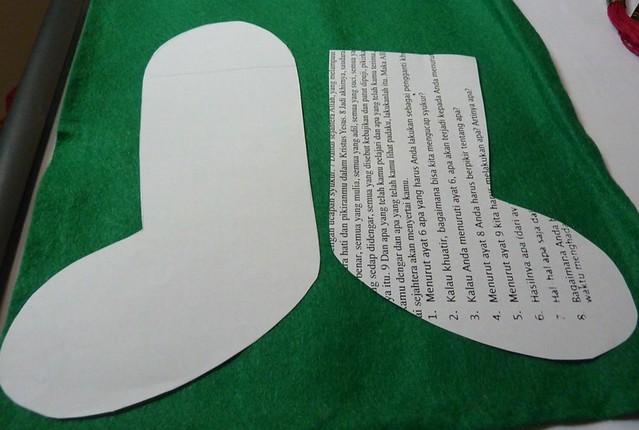
2. Place your templates onto the wool felt, draw around them and cut out the felt shapes.
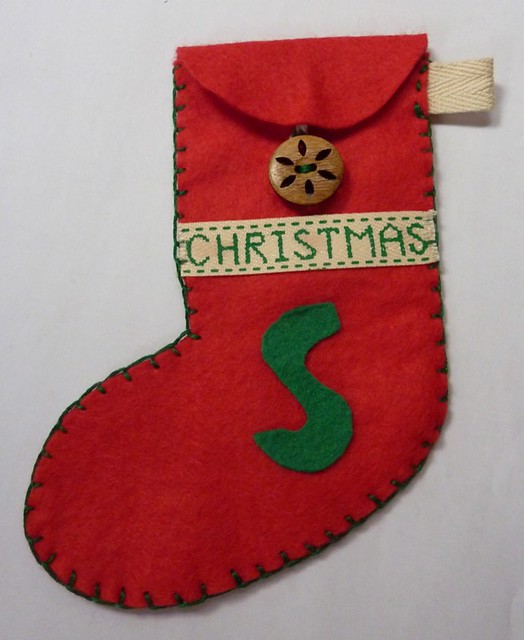
3. Decide on how you are going to decorate your stockings, keeping in mind that the top flap will be folded over, so leave some space for this. Using craft glue, glue on any ribbon or felt shapes that you are using. As these will be presents for school friends we decided to include the first letter of their names.

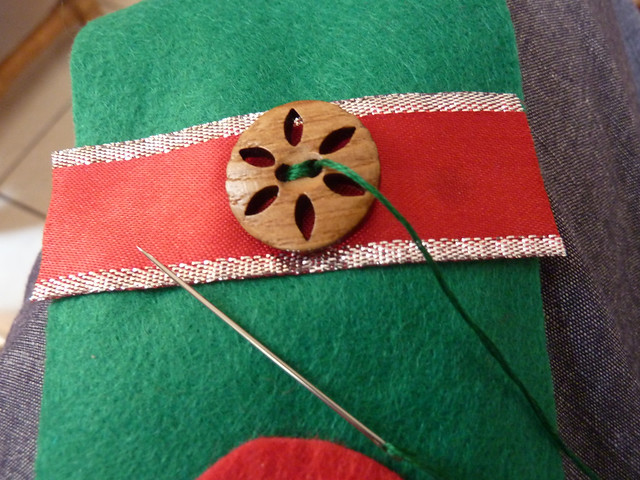
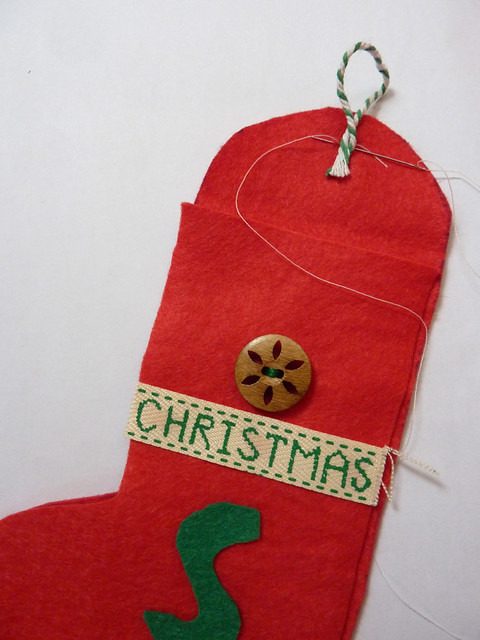
4. Hold the envelope flap down and then sew on your buttons in the correct place using some embroidery floss.
5. Use a hair elastic or some twine to create the loop for the button closure. Sew this onto the inside of the flap, being careful not to let your stitches show through on the other side. The felt is quite thick so this is fairly easy.
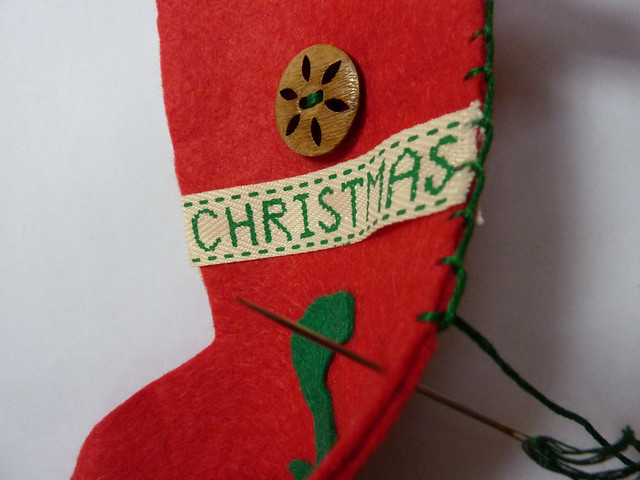
6. Line up the front and the back of your stocking, and pin a loop of twill tape in place (this is for hanging the stocking when it is finished).

7. Using embroidery floss and blanket stitch (I used this tutorial to remind me how to sew blanket stitch), sew the front and the back of your stocking together. Note that you will need to sew a couple of stitches of running stitch first through the twill tape, and then start on the blanket stitch.
8. Fill your stockings with whatever small gifts you would like and let your children gift them to their friends! I think chocolate and candy canes will be going in ours!
Now it's your turn to link up any Christmas/holiday makes that you have made this month. This month's giveaway is sponsored by The Village Haberdashery. The winner will receive a £10 gift voucher.

To enter the giveaway put your project on the link-up below.
As usual we want to say a huge thank-you to all the sponsors who have provided wonderful prizes this year. It is not too late to start creating gifts for Christmas!

  |
http://www.patchworkelephant.com/  |
These are really lovely Deborah! Almost makes me wish I had school age children again :)
ReplyDeleteExcellent idea. I have just added it to my pinterest board. Thanks.
ReplyDeleteThese would be perfect as an advent calendar too. Ho ho ho!!!
ReplyDeleteGreat idea! Pinned.
ReplyDeleteWhat a fab idea!
ReplyDeleteLove this! Wonder is it allowed to make one for myself?
ReplyDeleteGreetings! I"m coming to join your Link Party from Celtic Thistle Stitches blog - and linked to your Link Party! I just returned form traveling, but will blog about this great party on my blog tomorrow. Also just became a follower of your blog -
ReplyDeleteCheers!
Kim
WisdomwithNeedleandThread.blogspot.com
This looks like a fun and useful project, great for those children who enjoy some hand stitching too.
ReplyDeleteThese look lovely. Thanks for the great tute. - apparently, there's less than 18 weeks to go...I really should start thinking about making for Christmas soon or we won't have one this year!
ReplyDeleteThis is a great project to make with kids. Now, I just need to find me some tame kids in need of sewing lessons ...
ReplyDeleteYikes less than 4 months till Christmas!! These are such fun stockings. I love the big button you've used.
ReplyDeleteGreat idea to add the envelope element, perfect for Christmas, thanks for the tutorial.
ReplyDeleteThat's so cute! You could make a bunch of them and have them on hand for last minute gifting occasions - they could also be used as the gift wrap for a little gifty or gift card - sweet tutorial!
ReplyDeleteAn Envelope Christmas Stocking - what a clever and cute idea Deborah! Thank you for the tute too - I pinned it!
ReplyDeleteOh my, everyone here is so on the ball. I have not even begun making anything Christmassy yet.